
📌 Quick Answer
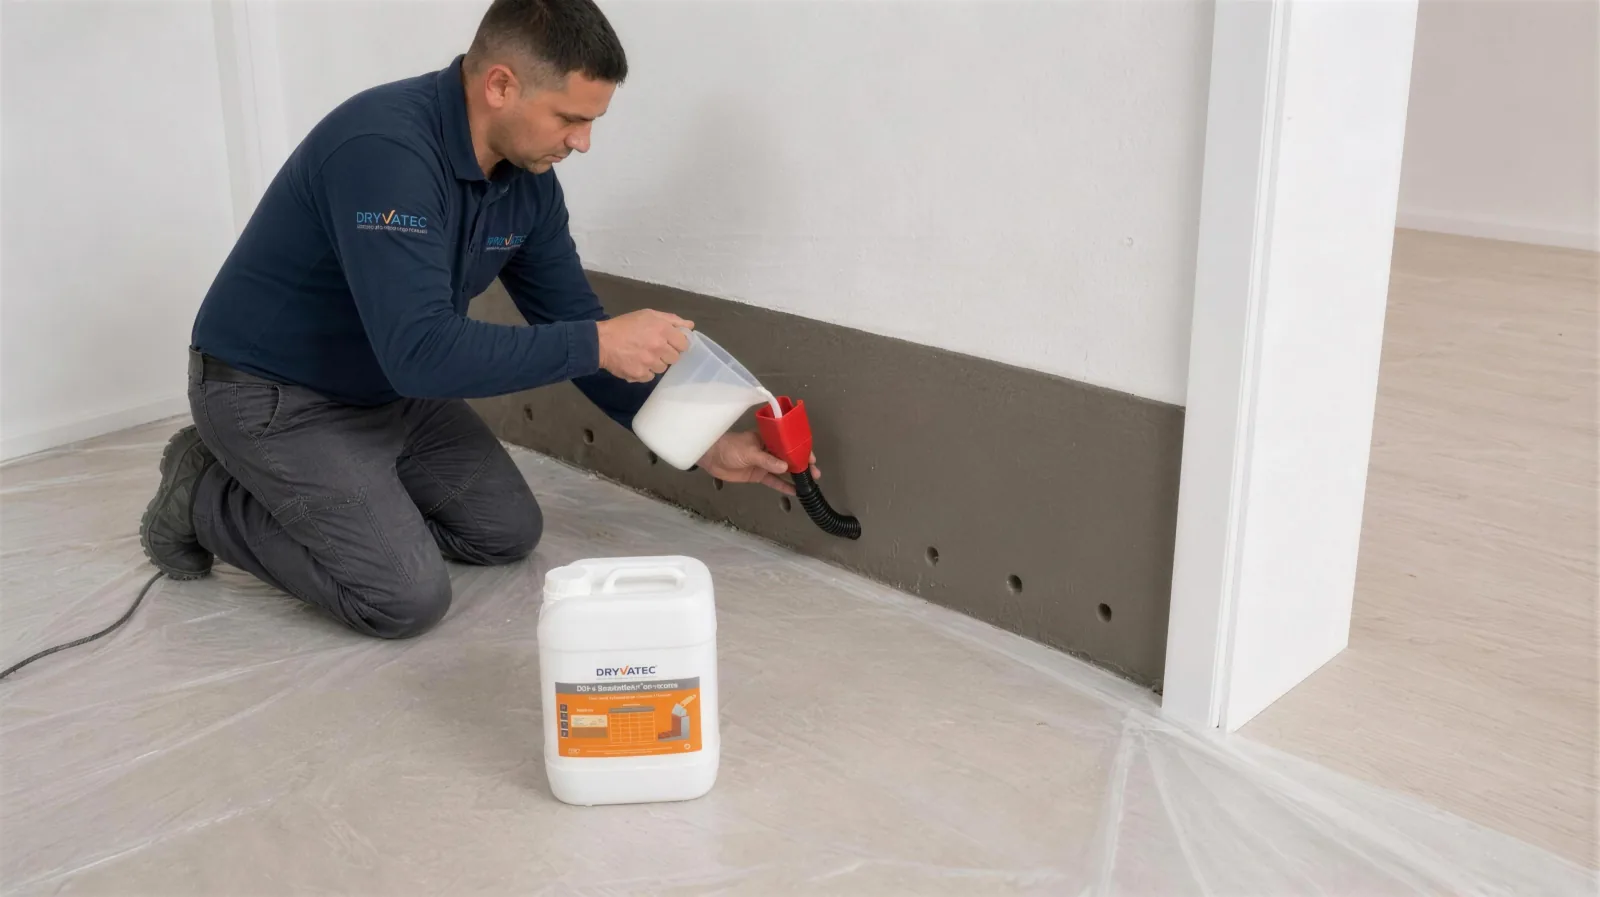
Damp injection means drilling holes into the wall 14 mm in diameter, about 10 cm above the floor, every 10 cm, angled 30–45° downwards and to a depth of 80% of the wall thickness, and feeding DampStop D101, mixed with water at a 1:9 ratio, into the holes. The order in the product instructions is: remove the old plaster → HydroFix damp-proofing plaster → drill the holes → DampStop injection → close the holes. Consumption is about 1.5 L of ready solution per metre on a 10 cm wall and 2.25 L on a 15 cm wall.
Rising damp is one of the most common moisture problems in buildings. Especially in older buildings with no horizontal waterproofing, water from the ground rises within the wall by capillary action; paint blisters, plaster crumbles and salt stains form. Damp injection aims to stop this rise at its source by forming a horizontal barrier at the base of the wall. In this guide we explain what damp injection is and how DampStop D101 and HydroFix damp-proofing plaster are applied in the order given in the product instructions.
What Is Damp Injection?
Damp injection (chemical injection) is the process of feeding a special liquid into holes drilled at the base of a wall to solve a rising damp problem. The liquid penetrates the pores of the wall material, forms a water-repellent (hydrophobic) zone and stops moisture rising from the ground from travelling up the wall.
The basic principle is simple: holes are drilled along a line close to floor level and the injection liquid is fed into these holes. The liquid merges with the zones of neighbouring holes to form a continuous horizontal barrier. This barrier cuts off the upward capillary movement of water.
Types of Damp Injection
Injection materials with different chemical compositions are available on the market. Each has a different purpose.
Rising Damp Injection (DampStop D101)
DampStop D101 is a concentrated injection material developed for rising damp and used diluted with water. 1 L of concentrate mixed with 9 L of clean water gives 10 L of ready-to-use solution. It penetrates the pores and forms a permanent horizontal damp barrier at the base of the wall.
Acrylic Gel Injection
Acrylic gel-based injection materials penetrate narrow gaps and cracks thanks to their low viscosity. They are generally used for curtain injection and where there is active water ingress.
Polyurethane Injection
Polyurethane-based injection materials expand on contact with water and are used to stop active water leaks. They come in flexible and rigid forms. They are chosen for stopping leaks, not for forming a rising damp barrier.
Resin Injection
Epoxy or polyester resin-based injection materials are generally used for structural crack repair and strengthening. They are not recommended as the primary material for rising damp.
In short: with rising damp, the aim is to form a horizontal barrier at the base of the wall; injection materials designed for rising damp, such as DampStop D101, are used for this.
Materials and Equipment List
Main materials:
- DampStop Complete Kit — 5 L of D101 concentrate + funnel + measuring jug + 14 mm drill bit (concentrate is also available in 1 L and 5 L packs)
- HydroFix Damp-Proofing Plaster — 10 kg powder + 100 ml liquid additive; applied to the wall surface before the injection, in place of the old plaster that has been removed (not included in the kit)
- Clean water — for diluting DampStop at 1:9 and for mixing HydroFix
Equipment:
- Hammer drill (with a 14 mm drill bit)
- Funnel (in the kit) — for pressure-free application; a low-pressure injection pump is optional and not included in the kit
- Mixing container and measuring jug
- Mixer, trowel and spatula for HydroFix
- Moisture meter (optional)
- Chalk or a marker
- Protective gloves, goggles and mask
- Vacuum cleaner / brush — for cleaning up after drilling
To work out how much material you need, you can use the Dryvatec Consumption Calculator.
Step-by-Step Damp Injection Application Guide
Step 1: Preparing and Measuring the Wall
Detecting the damp: If you wish, take readings with a moisture meter starting from the floor and working upwards to find out how high the damp has risen. This helps you decide how high the plaster to be removed should go.
Removing the old plaster: Scrape off the damp, damaged plaster to expose the brick or concrete surface; remove the skirting board if there is one. If this step is skipped, the material can seep out to the surface during the injection; and if the plaster is scraped off afterwards, the cells of the brick are opened up, so the material runs out and the application fails.
Checking the screed: On exterior walls, if the screed on the inside covers the injection line, the screed is broken out in a 10–15 cm wide strip so that the injection can reach down to the main slab concrete. On interior partition walls the screed does not need to be broken out; removing the skirting board is enough.
When the screed is removed, HydroFix is also taken down the wall face to the junction with the foundation concrete/slab; we explain why, against water that can come horizontally from beneath the brick through this junction, in the article Damp entering at the base of exterior walls.
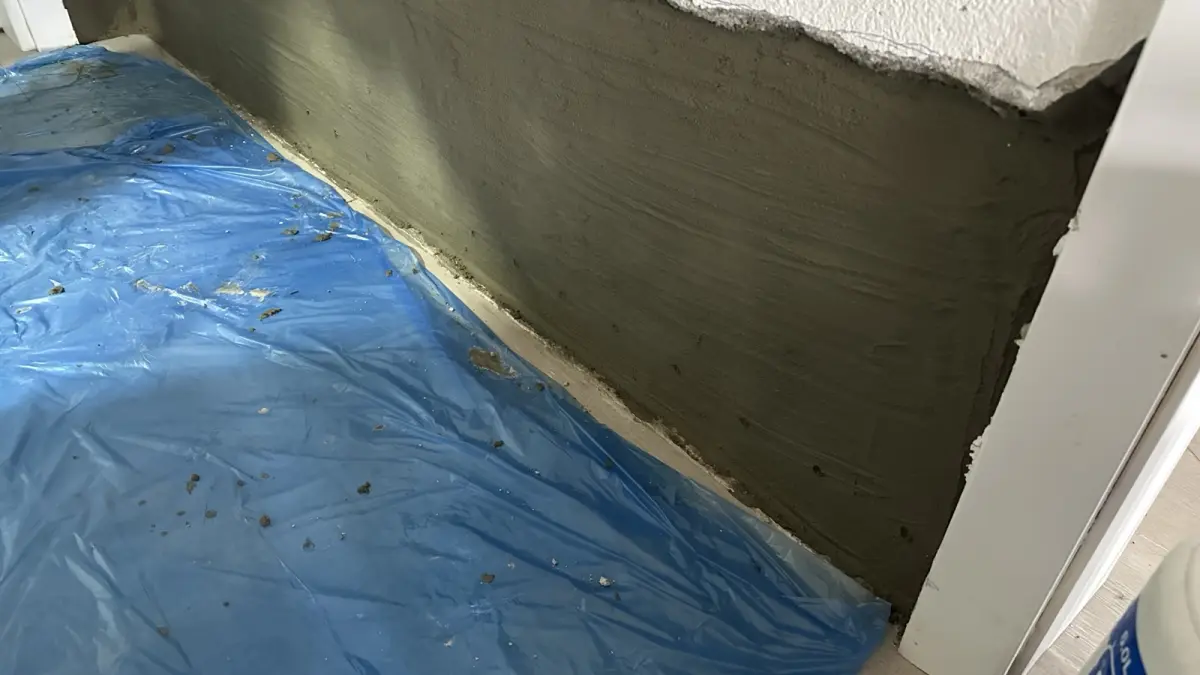
Step 2: Applying HydroFix Damp-Proofing Plaster
HydroFix is applied to the surface from which the plaster has been removed. The 100 ml liquid additive is poured into 2 L of clean water and stirred, the 10 kg of powder is added gradually and mixed with a mixer for 3–4 minutes; it is left to stand for 5 minutes, mixed for 1 more minute and used within 30 minutes at most. It is applied with a trowel in two coats, 2–2.5 mm per coat, for a total of 3–4 mm (3 mm recommended); the second coat is applied in the opposite direction once the first coat has dried (6–8 hours). HydroFix prevents the material from spilling out to the surface during the injection. For details, see our article How to Apply HydroFix.
Step 3: Drilling (Diameter, Depth, Spacing)
Once HydroFix has dried, the injection holes are drilled. The right diameter, depth and spacing ensure that the injection material spreads continuously within the wall.
Position: Draw a horizontal line along the wall about 10 cm above the floor and mark the hole positions on the line at 10 cm intervals.
Hole diameter: Use a 14 mm drill bit (technical range 12–14 mm; the bit in the kit is 14 mm).
Hole depth: Drill to a depth of about 80% (4/5) of the wall thickness. For example, in a wall 30 cm thick the holes should be about 24 cm deep. Very thick walls may need to be treated from both sides; for the depth and hole layout, consult the technical support line on +90 850 532 6 999.
Hole spacing: Leave 10 cm between holes; the spacing must never exceed 15 cm. In denser materials (concrete block, granite) the 10 cm spacing must be kept.
Drilling angle: Drill the holes angled 30–45° downwards from the horizontal. This angle helps the injection material penetrate the wall better with the help of gravity.
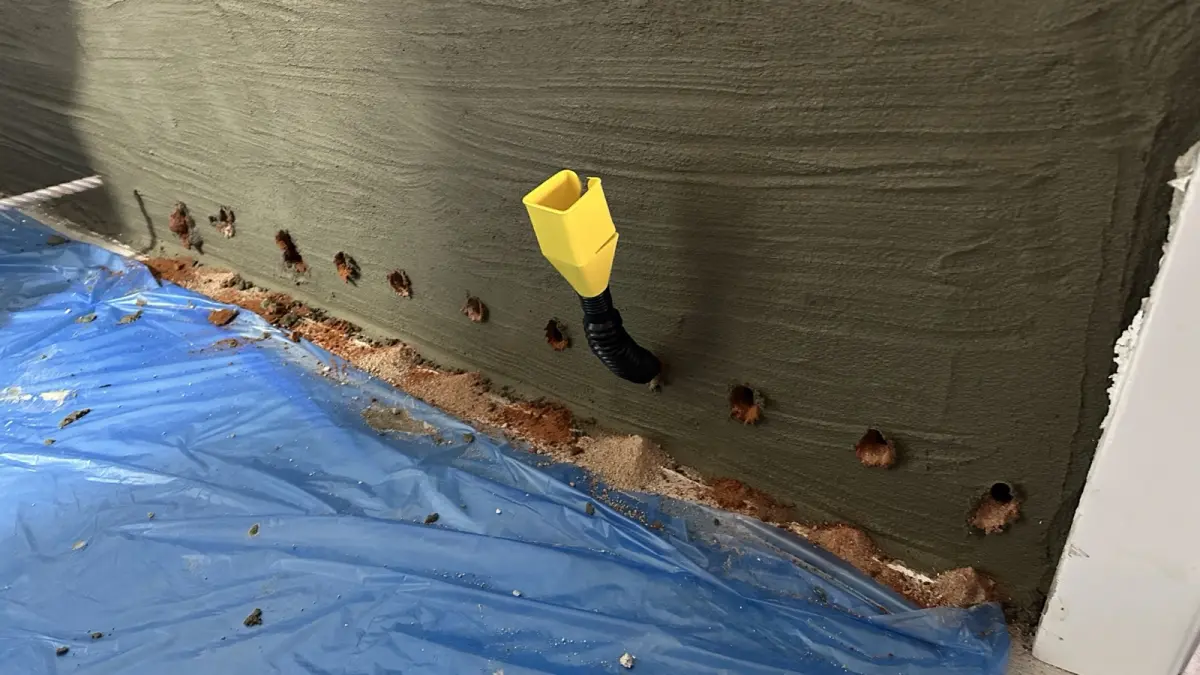
Important: Clean the dust created during drilling out of every hole. Dust can prevent the injection material from penetrating the pores.
Step 4: Preparing the Injection Material
DampStop D101 is a concentrated product; the mixing ratio is 1:9. 1 L of concentrate + 9 L of clean water = 10 L of ready-to-use solution; 5 L of concentrate with 45 L of water gives 50 L of solution. The 100 ml graduated measuring jug in the kit makes it easy to get the ratio right.
Preparing the mix: Prepare the mix in a clean plastic container, stir it until it is uniform and use it straight away. Use clean water only; dirty, hard (limescale-laden) or salty water reduces performance.
Caution: Wear gloves, goggles and a mask during application; ventilate the area well. In case of contact with the eyes, rinse with plenty of water and seek medical advice if necessary.
Step 5: Injecting
With a funnel (pressure-free): The prepared solution is fed into the holes using the funnel in the kit and spreads into the wall by gravity. No extra equipment is needed; individual users can apply it this way.
With a low-pressure pump: For professional applications, controlled injection with a low-pressure pump is recommended (the pump is optional and not included in the kit). Avoid excessive pressure.
Applying in rounds: Start at one end of the wall and work along in order. In less absorbent structures such as aerated concrete and solid concrete, first give each hole a small amount of solution, apply a second round 10–20 minutes later and repeat until the wall shows saturation.
Step 6: Waiting and Closing the Holes
After application, the injection material inside the wall must be left for at least 48 hours. The holes are then closed with plaster and the surface is made good.
Step 7: Drying and Painting
Once the barrier has formed, the moisture that had previously built up inside the wall takes time to evaporate. This time depends on the wall thickness, the existing moisture level, ventilation and the season; it should not be rushed. Ventilate the room well and, if you wish, follow the drying with moisture readings.
Before painting, wait for the HydroFix surface to be visibly dry, at least 3 days. Then prime the surface and use a breathable (vapour-permeable) paint; plastic or oil-based paints are not recommended.
Why Is HydroFix Applied Before the Injection?
In the product instructions, Dryvatec HydroFix is applied before the injection, in place of the old plaster that has been removed. This order is critical, especially on hollow (perforated) brick walls: HydroFix prevents the material from seeping out to the surface and spilling out during the injection. Stripping plaster can break open the cells of the bricks; if you inject first, the solution runs out through those breaks. If the plaster goes on first, the injection stays inside the brick without overflowing.
What HydroFix damp-proofing plaster adds to the system:
- Double protection: In addition to the injection barrier inside the wall, it also stops moisture from reaching the surface
- Breathable structure: It cuts off capillary water transport while allowing water vapour to pass through
- Prevents spillage: It stops the material from seeping out to the surface during the injection
- Preparation for painting: Once dry, it provides a suitable base for primer and vapour-permeable paint
Application Tips and Common Mistakes
Tips
- Apply in dry weather: Avoid injecting on rainy or very humid days.
- Always clean the dust out of the holes: Dust left after drilling can stop the material from reaching the pores.
- Use the mix fresh: Use the DampStop mix straight after preparing it.
- Calculate the amount of material correctly: Work out what you need in advance with the consumption calculator. Running out of material during application can break the continuity of the barrier.
- Take care at corners: Drilling too close to a corner can cause the edge of the wall to break.
Common Mistakes
- Getting the order wrong: Injecting before the old plaster has been removed, or scraping off the plaster after the injection, causes the material to seep out. The order is: remove the old plaster → HydroFix → drill the holes → DampStop → close the holes.
- Holes not deep enough: If the holes are not drilled deep enough, the material cannot reach the whole cross-section of the wall. Drill to about 80% of the wall thickness.
- Holes too far apart: Too wide a spacing leaves gaps in the barrier. Work at 10 cm spacing; do not exceed 15 cm.
- Wrong mixing ratio: DampStop D101 is mixed at a 1:9 ratio (1 L of concentrate + 9 L of water); do not deviate from this ratio.
- Painting too early or with the wrong paint: Do not paint the HydroFix surface until it has dried for at least 3 days; do not use plastic or oil-based paint.
- Applying without removing the screed or skirting board: The injection cannot reach the level it needs to, and the rise of moisture cannot be fully stopped.
Cost of Damp Injection
The cost of damp injection varies with the scope of the work. The main factors affecting the cost are:
- Wall length (metres): The number of holes is found by dividing the length by 10 cm; 100 holes for a 10 m wall
- Wall thickness (cm): About 1.5 L of ready solution per metre on a 10 cm wall, 2.25 L on a 15 cm wall
- Wall material: Less absorbent structures may need extra rounds to reach saturation
- HydroFix area (m²): 10 kg of HydroFix covers about 4.5–5 m² in a single coat and 2–2.5 m² in two coats
Current prices (incl. VAT): DampStop Complete Kit 8.700₺, DampStop 1 L 2.200₺, DampStop 5 L 8.000₺, HydroFix 10 kg 1.500₺. For a detailed worked example, see our Damp Treatment Cost Guide; for a calculation specific to your wall, use the Dryvatec Consumption Calculator.
Professional or DIY?
Damp injection is a job that requires care, but with the right materials and guidance a DIY application is also possible.
A DIY application is suitable when:
- The area to be treated is relatively small
- The wall construction is standard (brick or concrete block)
- You have experience using basic hand tools
- You are patient and pay attention to detail
Working with an experienced applicator is recommended when:
- The area to be treated is large (many walls, a large building)
- The building is historic or listed
- The wall construction is complex (stone wall, mixed materials)
- There is serious water pressure or a high level of moisture
DampStop kits are suitable for both individual and professional application, and the kit includes a step-by-step application guide. Dryvatec does not carry out site surveys or send applicators; you can send photos and measurements of your wall using the Request a Quote form or call the technical support line on +90 850 532 6 999.
Frequently Asked Questions
Is damp injection permanent?
An injection correctly applied with DampStop D101 forms a permanent horizontal damp barrier at the base of the wall. The condition for a permanent result is correct application: the right hole diameter, spacing, angle and depth, the 1:9 mixing ratio and the wall reaching saturation.
Can damp injection be done in any season?
The application can be carried out at different times of the year; however, the wall dries faster in dry, mild weather. The products must be protected from frost; application should not be carried out when there is a risk of frost. The application temperature for HydroFix is between +5°C and +30°C.
How long does it take to see results after damp injection?
The injection material is left in the wall for at least 48 hours. The drying of the moisture that had previously built up inside the wall, however, takes time depending on the wall thickness, moisture level, ventilation and the season.
Does damp injection damage the building?
Only 14 mm diameter holes are drilled for the injection, and these holes are closed with plaster after application. Drilling too close to corners should be avoided, and the hole depth should not exceed 80% of the wall thickness.
What should you watch out for during application?
Always wear gloves, goggles and a mask during application; avoid prolonged contact with the skin. Do not inhale or swallow the concentrate. Ventilate the area well, keep the product away from children and pets and protect it from frost.
Conclusion
Damp injection is a method aimed at stopping rising damp at its source. The horizontal barrier formed at the base of the wall with DampStop D101 provides protection both inside the wall and at the surface when applied together with HydroFix damp-proofing plaster.
The key to a successful application is the right order: remove the old plaster, apply HydroFix, drill the holes (14 mm, 10 cm spacing, 30–45°, 80% depth), inject DampStop at a 1:9 ratio and close the holes after at least 48 hours.
Take the first step towards solving the rising damp problem in your building: browse our products, work out the material you need with the consumption calculator, or fill in the form to request a quote.
Comparison of Injection Types
| Injection Type | Typical Use | For Rising Damp |
|---|---|---|
| DampStop D101 | Horizontal damp barrier | Yes — ≈1.5 L of solution per m on a 10 cm wall, ≈2.25 L on a 15 cm wall |
| Acrylic Gel | Curtain injection, water ingress | Not the primary method |
| Polyurethane | Stopping active leaks | Not the primary method |
| Resin | Structural crack repair | Not recommended |
For a full consumption calculation, you can use our consumption calculator.
Looking for a solution to your damp problem?
Our expert team is ready to offer you the most suitable solution.