
📌 Quick Answer
The definitive solution to wall damp is to find its source and cut it off there. Paint, gypsum or wallpaper only cover the surface; as long as the source persists, the same spot blisters again within a few months. There are three routes depending on the source: (1) If damp is rising from the base in the lower part of the wall, the salt-laden plaster is first removed and renewed with HydroFix damp-proofing plaster; once the plaster has dried, a moisture barrier is created in the wall with DampStop injection. (2) If there is condensation in corners, on the ceiling or around windows, ventilation and thermal insulation are corrected. (3) On a wall taking in water from the facade or from plumbing, the point where the water enters is repaired first. You can tell which type you have with the checklist below.
Products used when there is damp in the lower part of the wall
- DampStop Complete Kit — injection concentrate and application equipment in one box for rising damp at the base of the wall (HydroFix sold separately)
- HydroFix damp-proofing plaster 10 kg — replaces blistered, salt-efflorescent plaster; a breathable, salt-resistant repair plaster
- DampStop 5L injection fluid — a moisture barrier inside the wall against rising damp on larger walls
Pay by card or bank transfer/EFT · Free shipping within Türkiye · 14-day returns · Find out how much you need with the consumption calculator.
Have stains appeared on your walls? Has the plaster started to blister? Is the paint flaking and a mouldy odour spreading? Wall damp is one of the most common problems in homes in Türkiye and causes millions of liras of damage every year. But even more importantly, damp environments directly threaten your family's health.
So how is wall damp removed? Most of the suggestions that come up when you search online for a "damp solution" — painting, plastering, covering with wallpaper — do not solve the problem, they only hide it. In this comprehensive guide we will explain in detail the real causes of wall damp, how to tell its different types apart, and the proven permanent solution methods for each one.
What Is Wall Damp?
Wall damp is the presence of above-normal moisture on the wall surface or within the material. In a healthy interior wall the moisture level should be below 5%. When this level exceeds 10%, visual symptoms begin: stains, plaster deterioration, paint flaking and mould growth. Above 15%, serious structural and health risks appear.
Damp is not merely an aesthetic problem. It reduces the strength of building materials, lowers energy efficiency (a wet wall loses up to 50% of its thermal insulation value), degrades indoor air quality and causes health problems. According to the World Health Organisation, people living in damp buildings have a 40-50% higher risk of contracting respiratory illnesses.
To solve damp permanently, its source must first be correctly identified. This is because the solutions for different types of damp are completely different from one another — a wrong diagnosis leads to the wrong treatment and to wasted money.
Causes of Wall Damp
Wall damp has four fundamental causes. Understanding each of them is the first step to reaching the right solution.
1. Rising Damp
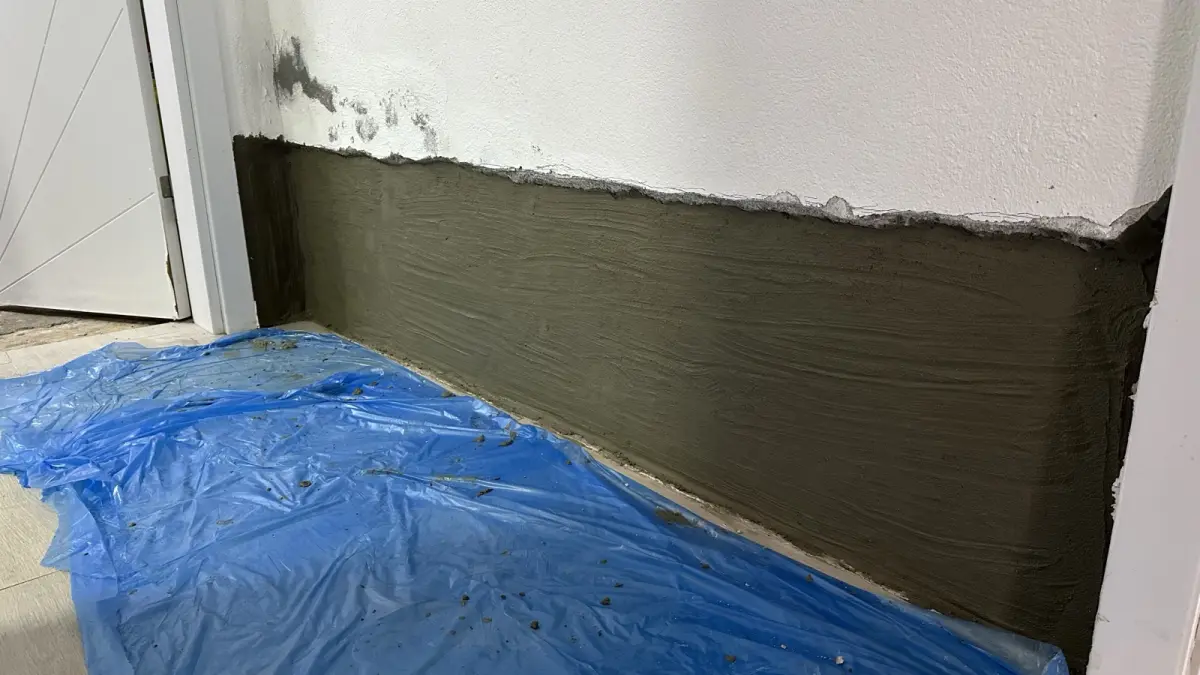
Water in the ground rises up through the pores of the wall by capillary action. This is the most common and most persistent cause of damp. It is seen particularly on ground and basement floors, in structures where the horizontal damp-proof course (DPC) is missing or has broken down. Rising damp reveals itself in the lower sections of the wall — between 30 cm and 150 cm from the ground — and forms a distinct wet-dry boundary line.
Rising damp carries the salts in the soil into the wall along with the water. These salts — sulphates, nitrates, chlorides — accumulate at the evaporation point to form white stains (efflorescence) and burst the plaster from within.
For more comprehensive information about rising damp, you can read our rising damp guide.
2. Condensation
When warm indoor air comes into contact with a cold wall surface, the water vapour in the air condenses to form water droplets on the wall. This is frequently seen especially during the winter months, on poorly insulated external walls, at window edges and in corners. The condensation point (dew point) depends on the indoor temperature, the relative humidity and the wall surface temperature.
Symptoms of condensation:
- Water pooling on window panes and frames
- Black mould stains in external wall corners
- Darkening at ceiling-to-wall junctions
- Dampness on walls and windows in the mornings
- Heavy damp in moist areas such as bathrooms and kitchens
- Mould growth behind furniture — particularly in cupboards standing against an external wall
Unlike rising damp, condensation appears in the upper sections of the wall and on cold surfaces. It is usually seasonal in character and can be largely brought under control with ventilation.
3. Water Leakage
Water enters directly into the wall through cracks in the external facade, defective mortar joints, damaged roof covering, blocked gutters or leaking pipes. This type of damp usually concentrates at a specific point and becomes prominent after rain.
Distinguishing characteristics of leakage-related damp:
- It spreads from a specific point (it is not uniform as in rising damp)
- It intensifies noticeably with rain
- It can occur at any height of the wall
- The stain shape is usually irregular and shows run marks
- It may dry out in dry weather, but the stain mark remains
4. Inadequate Ventilation
The tight insulation applied for energy efficiency in modern buildings sometimes also cuts off air circulation. Plastic-framed windows, well-insulated walls and rooms kept closed increase the risk of condensation in particular. If there is not enough ventilation in moisture-generating spaces such as the bathroom, kitchen and laundry room, the moisture produced accumulates in the walls.
Through its daily activities (breathing, cooking, showering, drying laundry), a family of four releases roughly 10-15 litres of water vapour into the air each day. If this moisture is not expelled outdoors, the walls inevitably become damp.
Telling the Types of Damp Apart
To reach the right solution, the type of damp must first be identified. Here is a simple guide for telling each type apart:
Is It Rising Damp?
- Is the damp in the lower section of the wall? (between 0-150 cm)
- Is there a distinct wet-dry boundary line?
- Are white salt deposits visible on the wall surface?
- Is the problem on the ground or basement floor?
- Does it continue constantly regardless of the season?
- Do internal walls (with no contact with the external facade) show the same symptoms too?
If you answered "yes" to most of these, you are most likely facing rising damp.
Is It Condensation?
- Is the damp in the upper sections of the wall, in corners or at window edges?
- Does it increase in the winter months and decrease or disappear in summer?
- Do water droplets form on windows and walls in the mornings?
- Is it more prominent in moist areas such as the bathroom and kitchen?
- Is there no salt deposit?
- Does it appear on external walls but not on internal partition walls?
These symptoms point to a condensation problem.
Is It Water Leakage?
- Does the damp spread from a specific point?
- Does it increase noticeably after rain?
- Is the stain irregular in shape and showing run marks?
- Does it appear on upper floors or under the roof?
- Is it more severe in wind-driven rain?
In this case there is probably water leakage from the external facade or roof.
In some cases more than one type of damp can be present together. For example, in a basement there can be both rising damp and condensation. On a ground floor, both rising damp and leakage can be seen together. For this reason, a professional moisture measurement is recommended for a definitive diagnosis. Send us photos through our Request a Quote form; our technical team will assess them online and get back to you as soon as possible.
Temporary Fixes and Why They Do Not Work
Most people who encounter a damp problem turn to the following methods as their first reflex. However, none of these is a permanent solution.
Painting
Painting a damp wall is the most common attempt at a "solution". Even products sold on the market as "damp paint" or "waterproof paint" cannot block the moisture — they only correct the appearance temporarily. The moisture that accumulates under the paint first forms bubbles, then lifts the paint, and ultimately bursts the plaster. The result: more damage and wasted money. What is more, the paint layer prevents the wall from breathing and accelerates the build-up of moisture.
Covering with Plaster or Gypsum
Covering a damp wall with normal plaster or gypsum means ignoring the moisture. When gypsum comes into contact with water it swells, softens and deteriorates — plasterboard should never be used on walls with a damp problem. Cement plaster, because of its non-porous structure, traps the moisture and causes it to come out at other points. In both cases the problem recurs within a short time — and over a wider area at that.
Wallpaper or Polystyrene Cladding
Covering the wall with wallpaper or polystyrene board traps the moisture behind it. This enclosed environment with no air circulation creates ideal conditions for mould and fungus growth. The wallpaper peels off within a short time, and layers of black mould form under the polystyrene. This method is both costly and seriously increases the health risk.
Why Do All These Methods Fail?
The common feature of these methods is that they try to treat the symptom, not the source. No matter how much paint, plaster or cladding you apply to a damp wall, as long as the source of the moisture is active the problem will certainly recur. For a permanent solution, you first need to identify where the moisture is coming from, then carry out the right intervention according to its source.
Permanent Solution: Intervention According to the Source
Once the correct diagnosis has been made, a different solution strategy is applied for each type of damp. Here are the permanent solution paths for each situation:
For Rising Damp: DampStop Injection
The permanent solution to the rising damp problem is chemical injection. A silane/siloxane-based chemical is injected into holes drilled in the lower section of the wall, creating a waterproof barrier within the wall. This barrier permanently prevents the moisture in the soil from rising in the wall — in effect a new DPC (horizontal damp-proof course) is created.
The DampStop chemical injection system, with its silane/siloxane-based formula, creates a permanent hydrophobic (water-repellent) layer in the wall pores. It requires no maintenance after application and consumes no energy. It is effective on all kinds of building material, including brick, stone, breeze block and mortar. It is a proven technology that has been applied successfully in Europe for over 50 years.
The correct order: first the damaged, damp plaster is stripped, then HydroFix damp-proofing plaster is applied; once the plaster has dried (24–48 hours), the holes are drilled and the DampStop injection is carried out. Why? Stripping plaster can break open the cells of the bricks; if you inject first, the solution runs out through those breaks. If the plaster goes on first, the injection stays inside the brick without overflowing. This dual system — damp-proofing plaster + injection — solves the rising damp problem at its root and prevents its recurrence.
For Condensation: Ventilation + Insulation + Damp-Proofing Plaster
To solve condensation-related damp, several interventions are applied together:
- Improving ventilation: indoor moisture is expelled outdoors through natural ventilation ducts or mechanical ventilation systems. Trickle vents above windows are a simple and effective solution.
- Thermal insulation: insulating the external walls raises the internal surface temperature of the wall and greatly reduces the risk of condensation.
- Damp-proofing plaster application: HydroFix damp-proofing plaster, thanks to its high vapour permeability, lets the wall breathe and reduces the effect of condensation.
- Moisture-balancing habits: using an extractor fan in the bathroom and kitchen, not drying laundry indoors, ventilating regularly.
The key in a condensation problem is to keep the indoor relative humidity below 60%. Above this level the risk of mould growth rises rapidly.
For Water Leakage: External Facade Waterproofing and Repair
With leakage-related damp, the point where the water enters must be identified and repaired:
- External facade cracks are repaired with elastic fillers and a waterproof coating is applied
- Defective mortar joints are renewed with a suitable mortar
- Damaged roof covering is repaired or replaced
- Gutters are cleaned, downpipes are checked and their connections tightened
- Plumbing leaks are fixed
Once the leakage has been stopped, the damage on the internal walls can be repaired with HydroFix damp-proofing plaster.
Wall Damp Solution with HydroFix Damp-Proofing Plaster
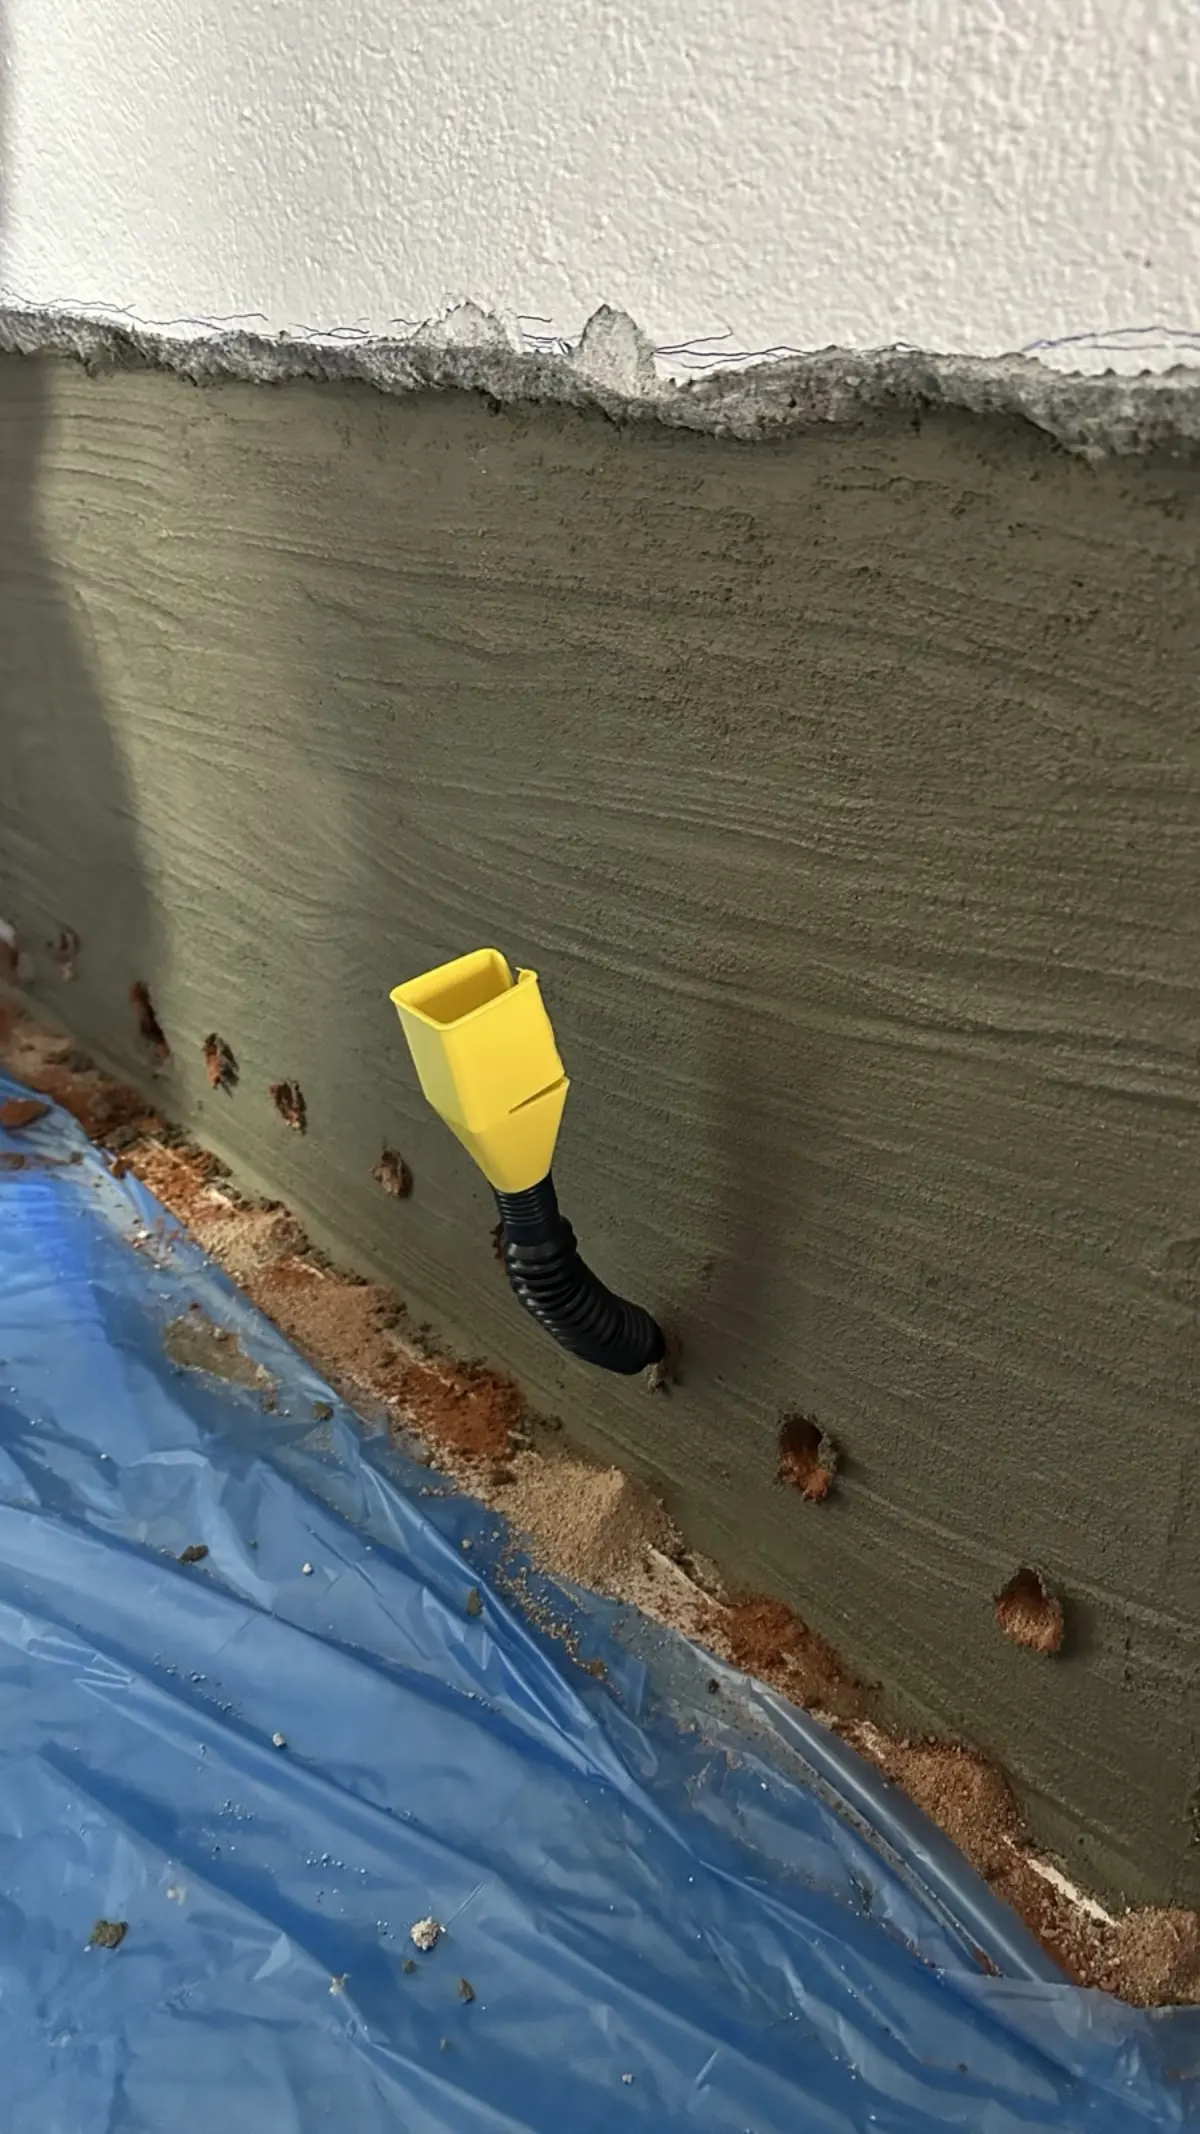
Whatever the source of the damp, it is very important to use a special damp-proofing plaster when repairing damaged walls. Normal plaster or gypsum deteriorates within a short time on walls with a damp problem. HydroFix damp-proofing plaster is specially formulated for these demanding conditions.
What Makes HydroFix Different?
- High vapour permeability: it allows the moisture within the wall to evaporate outwards — it does not trap the moisture, it lets the wall breathe
- Salt resistance: it withstands the expansion pressure created by salt crystallisation — it does not crack or burst
- Water repellency: it does not let water from outside pass through — it works one-way, from the inside out
- Strong adhesion: it grips perfectly even on damp surfaces and does not flake off
- Long life: it lasts 5-10 times longer than normal plaster in damp conditions
Where Is HydroFix Used?
It is used with confidence in place of the stripped plaster before DampStop injection for rising damp, on the internal surfaces of external walls to reduce the effect of condensation, in moist areas such as bathrooms and kitchens, at plinth level and in the restoration of historic buildings. On basement walls set into the ground, however, water enters from outside; there HydroFix only hides the problem for a while, and PU injection plus crystalline waterproofing is needed (see damp and water ingress in basements).
Application Steps
The application of HydroFix damp-proofing plaster involves the following steps:
1. Surface Preparation
The damaged plaster is completely removed up to at least 30 cm above the damp line, exposing the wall surface. The surface is mechanically cleaned of dust, loose pieces and salt deposits. If necessary, a hard clean is carried out with a wire brush. If there are sections of the wall weakened by damp, these are also consolidated.
2. Primer Application
A special primer is applied to the cleaned wall surface. The primer strengthens the adhesion of the damp-proofing plaster to the wall and limits the passage of salts. This step is critically important and must not be skipped, especially on old walls with a high salt content.
3. First Coat (Scratch Coat)
HydroFix damp-proofing plaster is applied with a trowel as a first coat 2–2.5 mm thick. This coat levels the surface and provides basic protection. Application can be carried out with a trowel or a plastering machine. Move on to the second coat once the first coat has dried (6–8 hours); full drying of the plaster takes 24–48 hours depending on the ambient conditions.
4. Second Coat (Finishing Coat)
6–8 hours after the first coat, a second, thinner coat is applied in the opposite direction. This coat provides a smooth surface and makes it ready for painting. The total thickness should be 3–4 mm (3 mm recommended).
5. Painting
Once the plaster has visibly dried (at least 3 days), it is painted with a breathable (open to diffusion) interior paint. Plastic-based paints should be avoided — silicate or mineral-based paints are ideal. These types of paint do not prevent the wall from breathing and preserve the performance of the damp-proofing plaster.
If you would like to calculate how much HydroFix damp-proofing plaster you need for your project, you can request a quote.
Cost Comparison
When comparing damp solution costs, you should look not only at the initial cost but at the total cost of ownership. Here is a comparison of the two approaches:
Traditional Methods (Paint + Plaster Cycle)
- Initial application cost: Low
- Durability: 6-18 months (the problem recurs)
- Total 5-year cost: High (3-5 re-applications required)
- Result: Temporary; the problem recurs and the damage grows a little more each time
DampStop + HydroFix Permanent System
- Initial application cost: Medium
- Total 5-year cost: Low (one-off application)
- Result: Permanent solution; the problem does not recur and the structure is protected
For an average ground-floor flat, the DampStop + HydroFix system is equivalent to two years' cost of the traditional methods — but because it cuts off the source of the moisture, it does not need to be applied again and again. For a detailed cost estimate you can request a quote or send us photos of your wall for a free online analysis.
"Will It Be a Permanent Fix?" Answer These 3 Questions First
This is the question we hear most on our WhatsApp line: "Will this fix it for good — it won't come back, will it?" The answer depends on three questions. A promise of a permanent fix before they are answered is misleading:
- Which floor is the damp on? Ground/entrance floor, basement or an upper floor?
- Where on the wall is it? A band parallel to the floor in the lower section; corners, ceiling edge or around windows; or a single spot?
- Is there soil behind the wall? Is the soil, garden or pavement outside higher than your floor inside?
| Answers | Diagnosis | Permanent solution |
|---|---|---|
| Ground floor · lower section · no soil behind | Rising damp | DampStop injection + HydroFix damp-proofing plaster, applied in the right order |
| Basement, or soil behind the wall | Water entering from outside | Stop the water ingress: PU injection, crystalline waterproofing (not injection) — basement and ground-floor damp |
| Corners, ceiling edge, around windows | Condensation | Ventilation and removing the thermal bridge |
| Upper floor, or one spot worse after rain | Water from the roof, façade, windows or plumbing | Repair the source — upper floor, ceiling and window damp |
To check your own case in three taps, use our quick diagnosis tool.
Frequently Asked Questions
Will the damp come back after treatment?
Not if the diagnosis is right and the method matches the source. For rising damp in the lower section of a ground-floor wall with no soil behind it, DampStop + HydroFix applied in the right order give a lasting result. If there is soil behind the wall or the damp is on an upper floor, the water comes from elsewhere and the solution is different; injection cannot promise it won't return.
Is there a definitive solution to wall damp?
Yes, but it is not a single product: the definitive solution is to cut off the source of the damp. For damp rising from the base, the salt-laden plaster is first removed and renewed with a breathable damp-proofing plaster; once the plaster has dried, a moisture barrier is created in the wall by injection. Condensation requires ventilation and thermal insulation; leakage requires repairing the point where the water gets in. Renewing paint and plaster without cutting off the source is only temporary.
Will wall damp go away on its own?
Rising damp and leakage-related damp do not go away on their own — if left untreated they get worse over time. Condensation-related damp may ease in the summer months but intensifies again in winter. In every case, a permanent solution targeting the source is required.
Do dehumidifiers solve the problem?
Dehumidifiers ease the symptoms by reducing the moisture in the air, but they do not remove the source. They can help in a condensation situation, but on their own they are certainly not sufficient for rising damp or leakage problems. They can be useful as a support during the drying process after injection.
What plaster should be applied to a damp wall?
Normal cement plaster or gypsum plaster should not be applied to a damp wall — they deteriorate within a short time. A specially formulated damp-proofing plaster (such as HydroFix) should be used. Thanks to their high vapour permeability and salt resistance, such plasters are long-lasting in damp conditions.
Is living in a damp home harmful to health?
Yes, it is definitely harmful. Damp environments create the ground for the growth of mould and fungus spores. These spores can cause respiratory tract infections, allergic rhinitis, asthma attacks and skin irritation. Children, the elderly and individuals with chronic illnesses are especially at risk.
I am a tenant; what should I do about the damp problem?
Under the Turkish Code of Obligations, resolving structural problems is the landlord's responsibility. Notify your landlord of your damp problem in writing (by SMS, email or through a notary). Identifying the source of the problem and providing a permanent solution is the landlord's obligation. If necessary, you can obtain support from the municipal health directorate or the consumer arbitration board.
Does exterior facade paint solve the damp problem?
Exterior facade paint can help with leakage-related damp — but it is not sufficient on its own. First the cracks and mortar joints must be repaired, then a waterproof exterior facade paint should be applied. For a rising damp problem, exterior facade paint is completely ineffective, because the moisture does not come from outside but from the ground — from the bottom up.
Conclusion
Wall damp is a problem that can be solved permanently with the correct diagnosis and the correct intervention. What matters is to intervene at the source of the moisture rather than using temporary fixes such as painting or covering. The solution for each type of damp is different — injection for rising damp, ventilation and insulation for condensation, external facade repair for leakage.
For a rising damp problem, DampStop chemical injection, and for condensation and general damp repair, HydroFix damp-proofing plaster offer a permanent and proven solution. When these products are used together, they both protect your wall from damp and restore it to its former health.
To calculate how much of which product you need, request a quote. For a free online analysis, send us photos through our Request a Quote form — our technical team will assess them remotely and suggest the most suitable solution as soon as possible.
Damp Types and Correct Solution Table
| Type of Damp | Symptom | Location | Correct Solution |
|---|---|---|---|
| Rising Damp | Horizontal stain from the base upwards, salt efflorescence | Ground floor (0-100 cm) | DampStop injection |
| Condensation | Dripping on windows, mould, damp on the ceiling | Bathroom, kitchen, external wall | Ventilation + HydroFix |
| External Leakage | Stain after rain, run marks | Upper floors, external wall | External facade waterproofing |
| Plumbing Leak | Localised wetness, constant | Along the pipe run | Plumbing repair |
You may also find these useful: What to do about a wall letting in water from outside? · Covering a damp wall: can you use plasterboard, panelling or wallpaper? · Which damp remover actually works?
Looking for a solution to your damp problem?
Our expert team is ready to offer you the most suitable solution.